This is the first in a series of blog posts describing the process I undertook to recreate the child-sized coat armour on display at the Musée des beaux arts in Chartres, France. This post covers the challenge of finding a proper silk lampas fabric to match the look and feel of the original. Though this re-creation project came and went years ago (in 2011 and 2012 to be exact), I never published details on my process beyond a few loose-leaf notebooks shown during slide lectures and exhibits. My full-length paper on this topic is available here.
My first concern was to find suitable fabric. In 2011, there weren’t as many interesting and period-appropriate silks on the online market as there are today. The original coat armour had been made from a monochrome crimson silk lampas with a complex pattern woven into the cloth.

I felt compelled to find a real silk lampas rather than a silk damask. Sometimes people confuse the two fabrics, which is easy to do when dealing with a polychrome version of damask. Damasks could be quite elaborate in the 14th century. They frequently included supplemental wefts for polychrome designs, but damask’s defining characteristic is that its patterns are usually created with a satin weave while its ground is usually made with a sateen weave. These days, we are used to seeing monochrome damasks with shiny patterns appearing on a matte ground.
![Italian silk damasks from the 14th century. The original uploader was Brian0918 at English Wikipedia (Original text: The New York Public Library) [Public domain], via Wikimedia Commons.](https://cottesimple.com/wp/wp-content/uploads/2017/02/512px-ItalianSilkDamask.jpg)
Lampas, on the other hand, typically has a taffeta ground and always uses supplemental wefts to create patterns and textures. By floating these extra weft threads over or under differing numbers of warp threads, it is possible to create an unparalleled lushness and intricate variety. In the 14th-century hey-day of lampas weaving, metal threads made with real gold or silver were frequently used to stunning effect.
![By PHGCOM (Own work, photographed at Musée de Cluny) [CC BY-SA 3.0 (http://creativecommons.org/licenses/by-sa/3.0) or GFDL (http://www.gnu.org/copyleft/fdl.html)], via Wikimedia Commons](https://cottesimple.com/wp/wp-content/uploads/2017/02/Lampas_with_phoenix_silk_and_gold_Iran_or_Irak_14th_century.jpg)
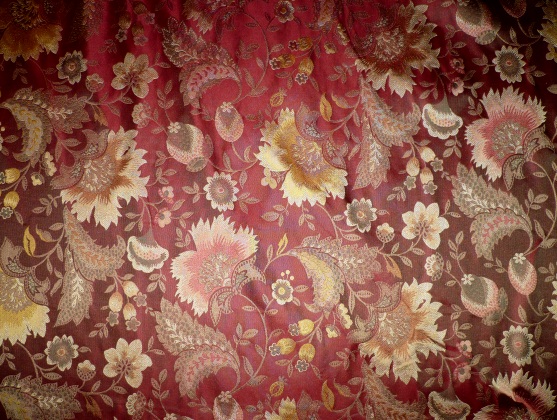
After combing over multiple online sources, I finally decided to buy a pricey silk lampas from silkresource.com. It had a similarly busy pattern, but was decidedly un-14th-century-like. It lacked all the aesthetic hallmarks of that time period, but in my imagination, I projected an overlay of deep crimson dye to minimize the obvious anachronism and provide the right texture and hand. I was willing to take the chance it would work well enough to disguise the later-period pattern. At that time, I just had no luck in finding a lampas with a better pattern.
I convinced a friend and colleague of mine, David Rylak, of Rough from the Hammer, to help me with the large feat of dyeing a few yards of this 100% silk fabric. We began with dyeing a couple of test swatches on the stove, before committing to the much larger and riskier task of dyeing yards’-worth of expensive fabric.
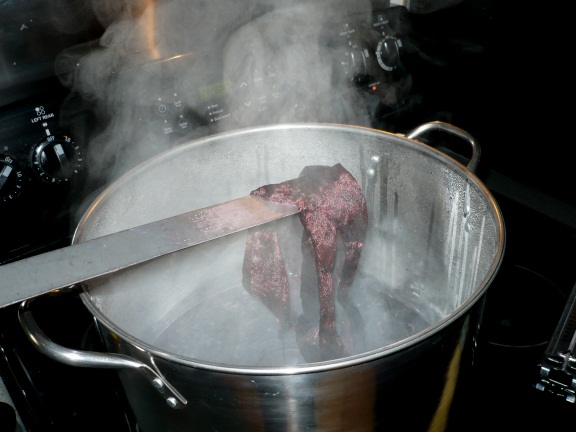
We found the results encouraging.

The color was perfect—a rich, vibrant crimson which settled into the lampas’ complex weaving pattern well. It provided the perfect duel effect of brightening the field of the fabric while reducing contrast of the woven motifs.
Next, the serious business began. Dave had purchased a large food-grade stainless steel barrel in advance. He needed a new quenching vat for his armour business, and since my use of the barrel would involve one day of work, he was willing to let me break it in with my gonzo dye job.
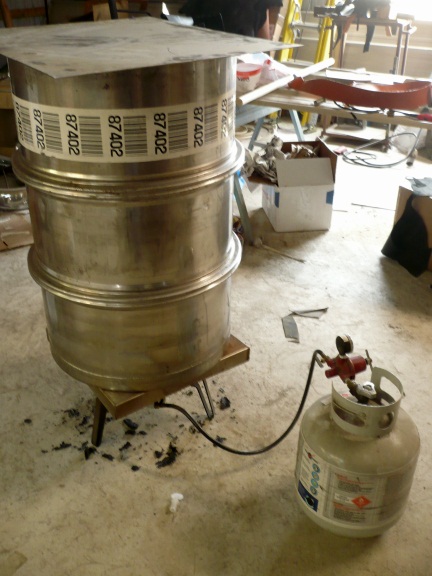
We began by heating water to a near-boiling temperature, which was harder to do than you might think. We were working in an unheated pole barn in the dead of winter, and there was a lot of water volume to heat. Dave began the process by using a propane-fueled turkey fryer setup. When we realized the water was heating too slowly, he wrapped a belt heater around the barrel’s midsection.
Once the water reached the needed temperature, we dumped in the powdered jacquard dye which I’d purchased from Dharma Trading Co., and stirred well to dissolve it. Next came the moment of no return. We dunked the fabric and began a laborious phase of non-stop stirring so the fabric would not be unevenly dyed.

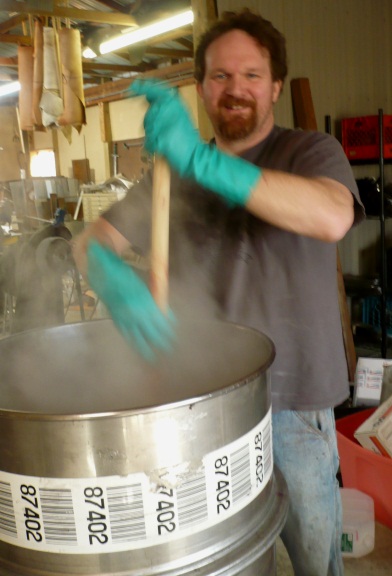
In time, we could see the cloth taking up the dye, and the bath was getting clearer. I learned a lot about silk dyeing on Dharma Trading’s website. I highly recommend their products and customer service in this area. I’m just a satisfied customer; no one paid me to say that!
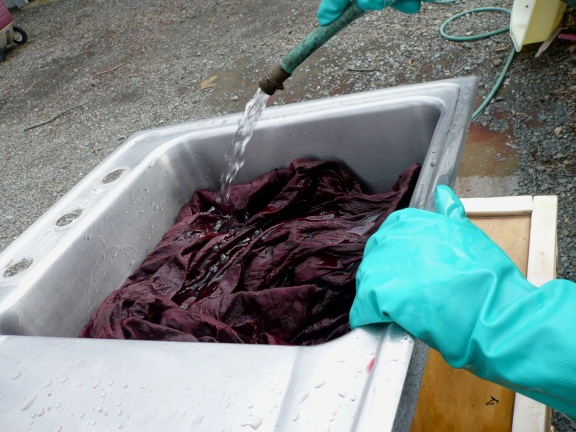
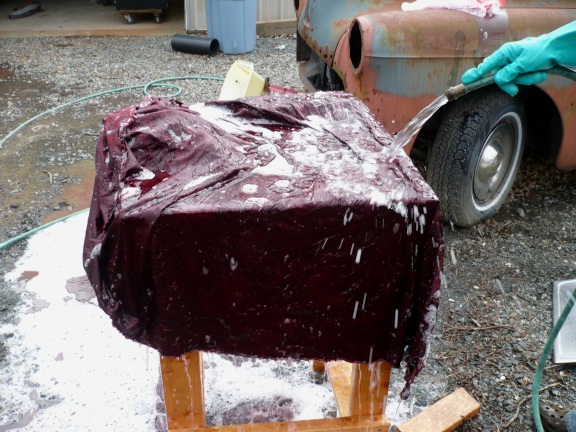
At last, I decided the time had come to take the cloth out and rinse it. This prospect was daunting due to the weather, and the only safe place to perform this task was outdoors, using near-freezing water.
The final step was drying the soaked silk. Dave tried hanging it from the rafters in his pole barn for a while.
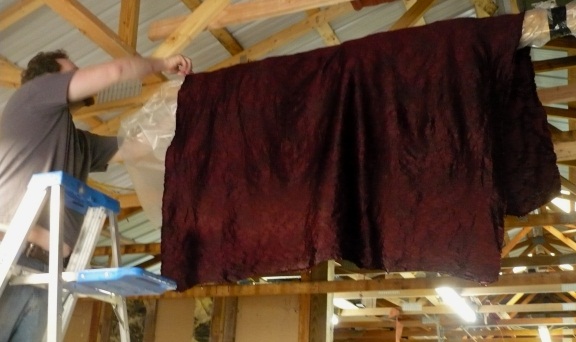
It kinda-sorta worked. Eventually we gave in and threw it in his clothes dryer. Had this been the middle of summer, I’m sure the hang-it-up method would have worked far more efficiently.
The final appearance of the fabric was as close to perfect as I was going to get.

My next task was to recreate the pattern and begin padding and quilting. Stay tuned for that installment coming very soon! (Part 2: Drafting the Pattern)