This is the fourth in a series of blog posts describing the process I undertook to recreate the child-sized coat armour on display at the Musée des beaux arts in Chartres, France. This installment covers the sewing techniques used in attaching all the pieces and finishing all the edges. You can find the earlier installments here:
Once I had all the pieces quilted and cut to shape, it was time to stitch everything together, make the buttons and buttonholes, and finish all the edges. I used the techniques I observed during my examination of the original. If you want to compare what I’ve done against the original, you should take a look at the photos in my article <link>, which the curator took at my request and which are not published elsewhere.
I acquired red silk quilting thread from Superior Threads and undyed linen sewing thread from Wm. Booth, Draper.
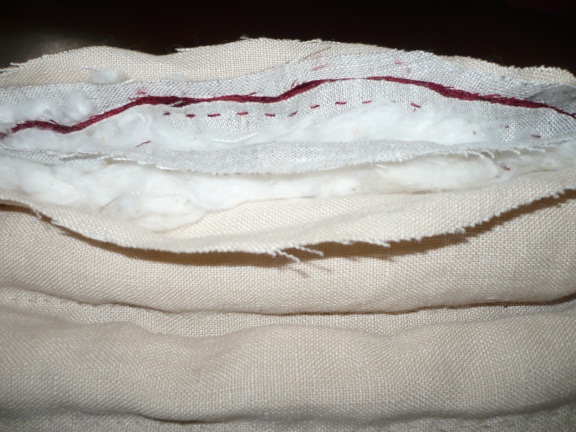
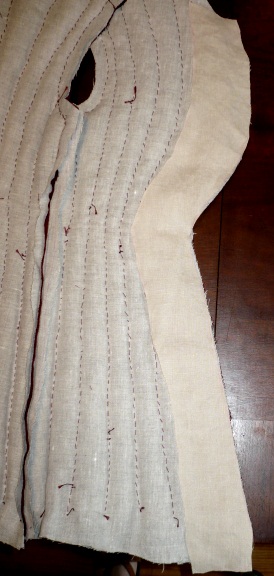
I started by connecting the lining pieces along the long seams, using a sturdy, undyed linen thread and a tight running stitch.

I then did the same for the outer assemblies.

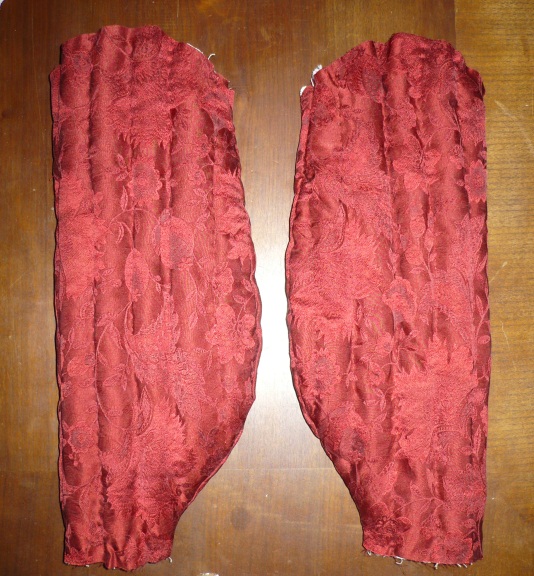
Sleeve assembly came next. The original coat did not have any exposed seams, including inside the sleeves. This meant that I had to fold the sleeves in half length-wise and first sew the silk edge together, good sides facing each other.
I then folded over the edges on the linen and sewed them together using an invisible running stitch that ran between the folds, out of sight. This would have been a stronger join if I’d used a proper ladder stitch, which is this situation’s equivalent to using stab stitch instead of running stitch.
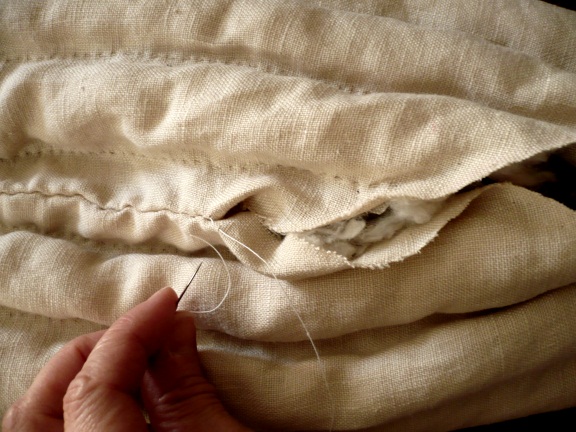
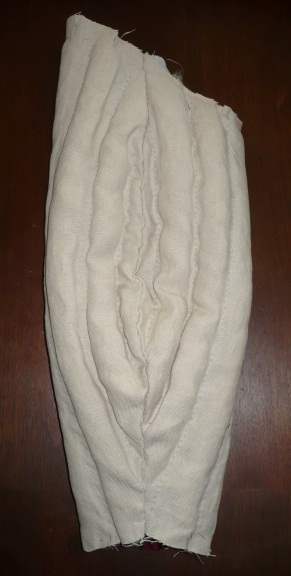
Very carefully, I turned the sleeves right-side-out when finished.
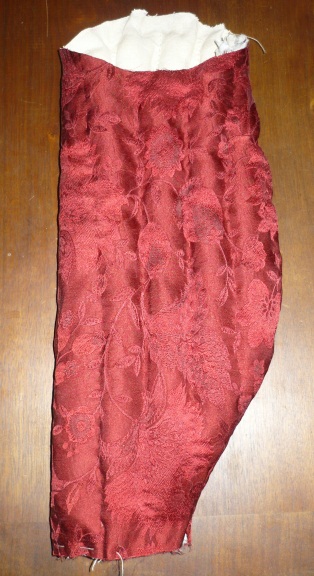
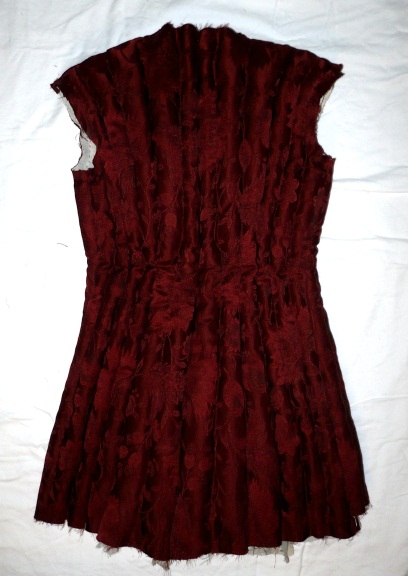
I was beginning to see the shape of this tiny coat armour coming together.

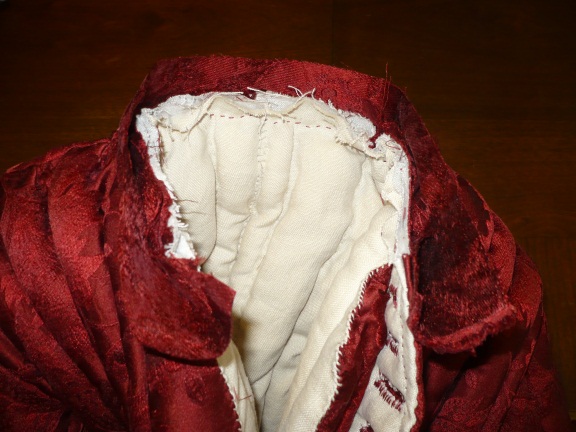
Next, I put the lining inside the shell assembly, with the flatter, base sides facing each other. I stitched along the back seam on the inside, connecting the shell with the lining with a large overcast stitch. I had to be careful not to poke the needle all the way through to prevent the light gray thread from appearing on the crimson outside fabric. The original maker used undyed linen thread, so I used the same.
I then attached the lining’s shoulder seams and the shell’s shoulder seams.
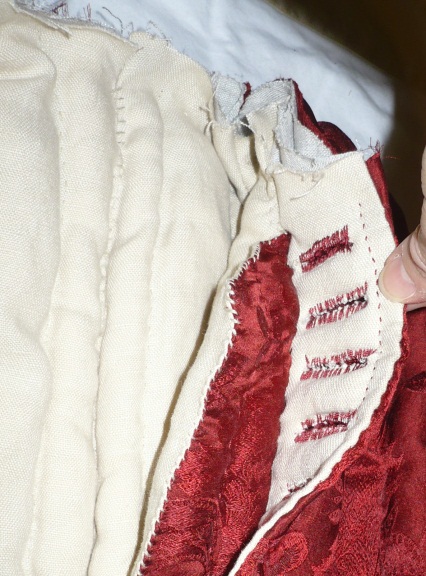
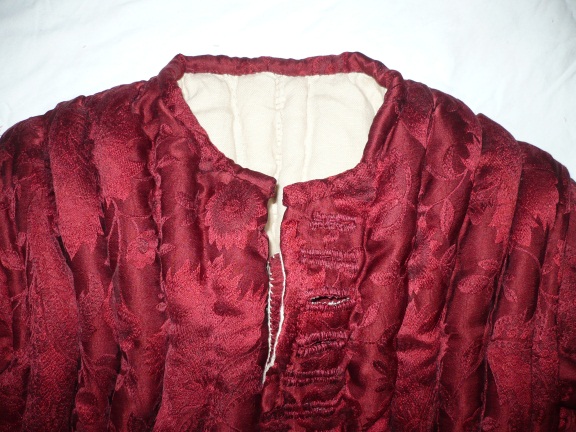
Remember when I mentioned making a mistake in the last blog post? I said that using the undyed linen for outer assembly’s base layer caused a problem. On the original coat, the buttonhole flap was created solely from the outer assembly while the placket behind it was created from the lining assembly. The backside of the buttonholes were going to be visible, of course, and that linen needed to be the good stuff. Instead, the backside of my outer assembly—the base layer of linen that had been stretched on the frame—was the undyed linen that I had intended to hide. To fix this discrepancy, I basted a strip of good cream linen to the backside of the area where the buttonholes would go.
Before sewing any buttonholes, I had to make some buttons and practice buttonholes to confirm their width against the originals on the coat.
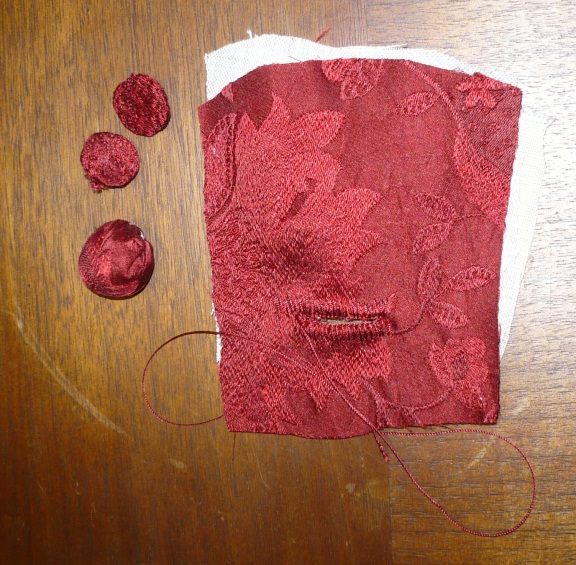
Next I sewed the buttonholes, starting at the bottom. Tip: Always start your buttonholes or your lacing holes from the least-visible end of the area you will be covering. For front openings, this is the bottom. For sleeves, this is the area furthest from the wrist, unless your buttons extend all the way up your arm. In that case, the elbow area is the best place to start, working your way out from the center. You’ll get better as you go, and your earlier, less-wonderful ones will not be the first ones scrutinized by onlookers.
I left a sparse amount of cotton padding between the fabric layers under the buttonholes; just enough to give it body, but not enough to hinder the sewing process.

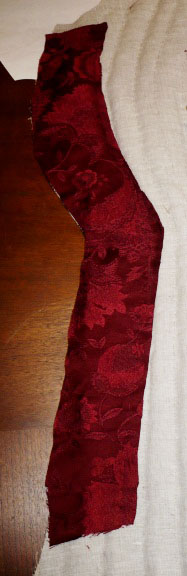
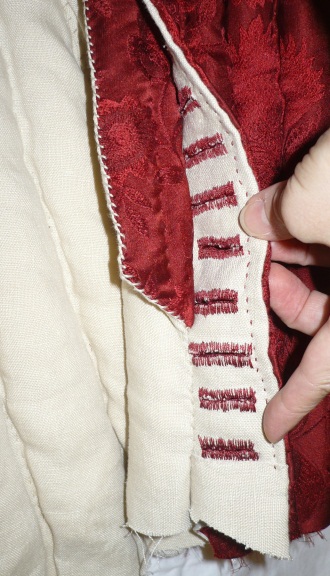
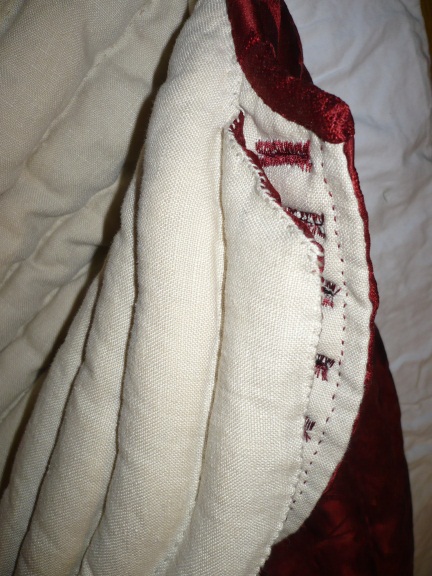
I then started the placket, or underlap. I laid down a strip of crimson silk lampas over the undyed linen of the lining assembly’s left front opening. This red strip would lay directly behind the buttonholes when finished. I did not attach it on both long sides of the strip; only on the inside long side initially. I took care to attach it at a deep enough distance from the opening to eventually hide the basting stitches between the layers. Also, I had to stitch only as far as the first layer of linen, to prevent the thread from showing on the outside of the lining.
At this point I had not yet finished any edges.

Everyone’s favorite part of sewing is sleeve attachment (ha ha). Just as with a normal sleeve insertion, I put the right-side-out sleeves into the inside-out armholes from the inside of the garment. I sewed the silk sleeve edges to the silk armhole edges.

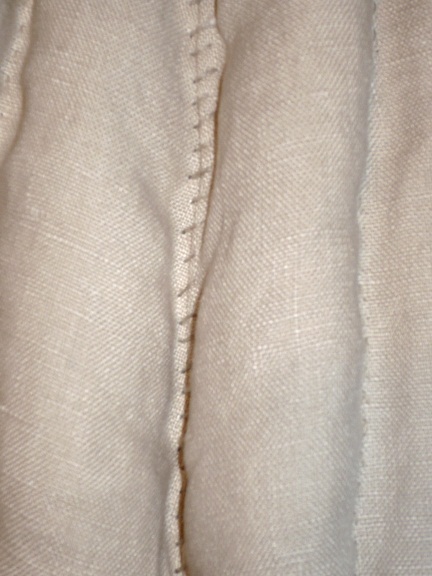
To finish the lining edges, I turned them inwards and whip-stitched them to each other with a tight, tiny stitch length for extra strength, as the original had.

With an s-curve sleeve cap like this coat has, the long seam of the sleeve runs down the back of the arm.
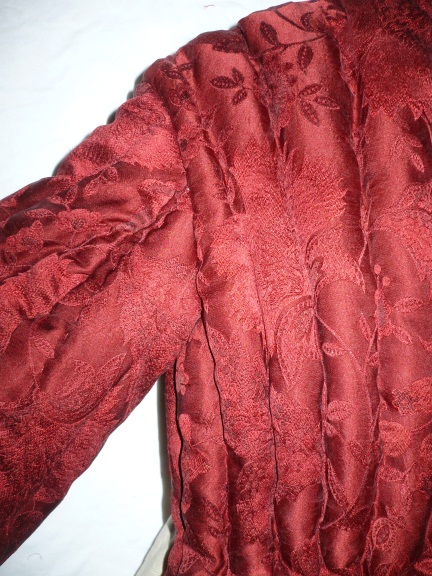
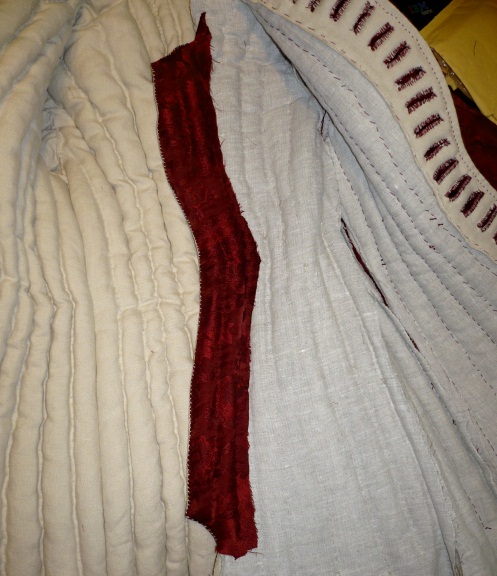
Once the sleeves were on, I returned my attention to finishing the buttonhole edge and placket. The original placket was padded, separated by a line of quilting down its center. I added raw cotton between the silk strip and the lining assembly and quilted the central line. Then I finished the buttonhole flap’s edge, using an invisible running stitch.

With the buttonholes finally squared away, I turned to completing the placket. I placed more cotton against the inner channel and then whip-stitched the placket closed, cutting it to the abbreviated, angled length seen on the original.

I then went back to the buttonhole edge and sewed small stab stitches parallel to the opening, about 1/4″ in from the edge to reinforce it, as I realized the original had this, and I’d almost skipped over it.
But then, a small disaster presented itself. I realized I’d accidentally sewn an extra buttonhole! The original had 27 buttonholes, and I’d managed to sew 28. I decided to patch over the bottom-most buttonhole. To disguise the patch, I lined up its top edge against the bottom edge of the buttonhole above it and re-stitched the bottom half of that buttonhole to hold the patch in place. Then I folded over the patch’s edge on its right side, and attached it with tiny stitches. Later, when I finished the left edge and the hem, it would blend completely.

With the buttonhole hullabaloo finally behind me, I connected the two assemblies to each other next. I sewed the lining (with placket) and shell/outer (with buttonholes) together with an invisible running stitch, just past the buttonholes.

Next came the button-side opening. I finished it by turning the rough edges of the outer assembly in to face the turned-in rough edges of the lining assembly. I whip-stitched them together using the undyed linen thread, as had been done with the original.
Finishing the neckline was the next logical step. The original coat does not have a collar. Instead, the neckline is bound with an on-grain strip of crimson lampas. I laid the binding strip good-side-down, against the good side of the neckline edge and stitched it with running stitches.
Then, I folded the strip over the rough edges and ratcheted it down tightly before overcast stitching the tucked-under binding to the lining.
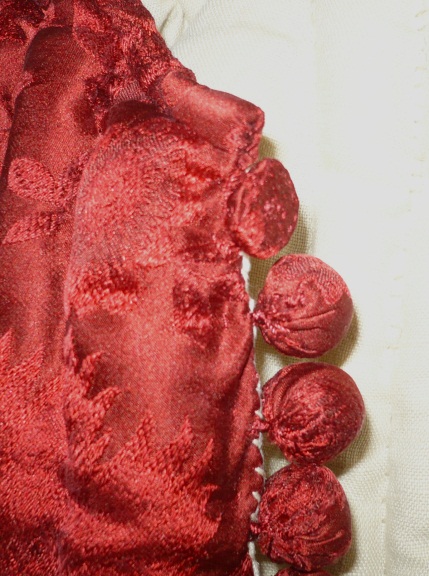
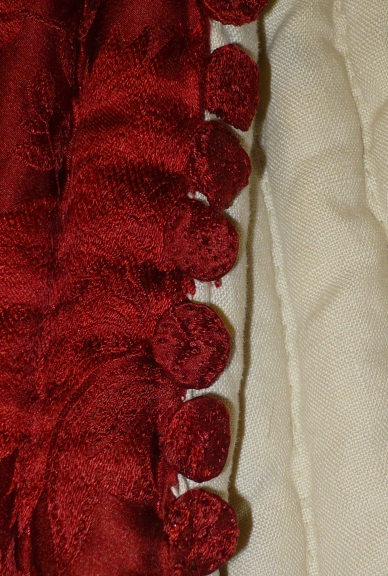
Next came the buttons. The original coat had 11 spherical buttons and 16 flat-faced buttons, both covered in the silk lampas. The flat-faced buttons were stitched through in concentric circles. For the spherical ones, I was hard-pressed to come up with the right material for the stuffing. They were clearly not made from wood or metal, as they had some amount of give. It was also clear that self-stuffing them with the lampas would not achieve the desired firmness or smoothness. I know I’m going to get teased for this admission, but I ended up using lint from my clothes dryer’s lint trap. What can I say; it worked perfectly!
I made the flat buttons from a thick sheet of industrial, 100% wool felt from McMaster-Carr. I cut out disks and shaved off some wool at an angle on the underside to sharpen the edges and create the mild conical shape seen on the originals. Then I covered them with silk and stitched through in 3 concentric circles of stitches.

I sewed the buttons to the right front edge using a silk crimson buttonhole twist thread. To form a sturdy shank, I looped the thread between the backside of the button and through the edge 3–4 times before winding the thread around the loops as tightly as possible. I then poked the needle back through the edge of the front opening and tied a knot on the inside, between the outer and lining assemblies. Since the hem had not yet been sewn, I could easily reach up between the two assemblies and tie hidden knots.

On the original, the maker had done a running stitch about 1/4 inch in from the finished edge, presumably to keep the padding from bunching against it and reducing its sharpness. I did not take this step, but in retrospect I should have.
On to the sleeve hems. They were something of a mystery on the original. The original bottom edges had been worn away, so there is no way to know whether the current conserved finishing is accurate to the original. There may have been a binding like the neckline, or perhaps even a full separate cuff.
I chose the most straightforward course and folded in the rough edges, whip-stitching the hems closed using the red silk thread.

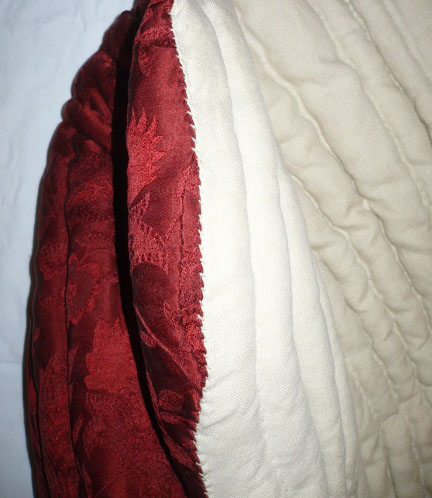
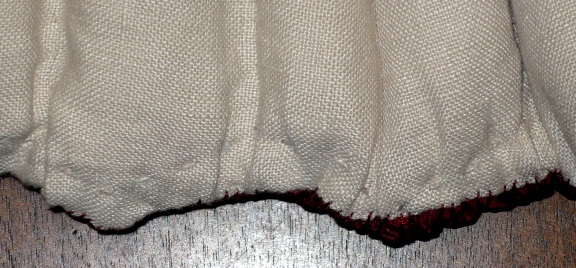
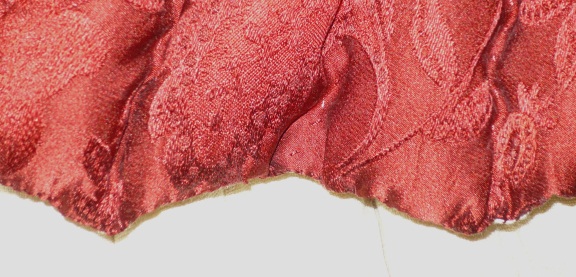
The skirt hem, with its shallow, wavy scallops, was the only remaining piece I had to finish. And man, it was the hardest part of all. This is because the deep fullness of the stuffed channels results in a superfluity of fabric at the hem. There’s no easy way to smooth out the rough edges before finishing them in the wavy shape seen on the original. Indeed, the hem on the coat armour is slightly gathered all around in order to make it lay flat rather than buckle.
Complicating matters further, the original assemblies had each been prick-stitched about 1/2 inch in from the hem edge, presumably to hold the padding up so it would not pool at the hem. The lining assembly had been stitched with linen, while the outer assembly was stitched with red silk. The short, widely-spaced stitches show on the front (i.e. on the lining and on the outside of the coat), while long floats must exist on the inside, out of sight. This means the maker had to finish the prick stitching first, and then attach the two assembly edges together last.
I was running out of time, as I was working on this last task in England, on my way to the International Medieval Congress at Leeds in July 2012. I was presenting my paper and planned to show the reproduction as a visual aid. As a result, after completing the prick-stitching on the lining assembly, I gave up on prick-stitching the outer assembly. I proceeded directly to hemming the two assemblies together with an overcast stitch. It was a challenge to wrangle the extra fabric to create smooth wave shapes. Later, I should have gone back, picked it out, and done the prick-stitching first to hold back the padding. Now, 5 years later, some padding has migrated south and is plumping up the hem too much. It’s on my to-do list.
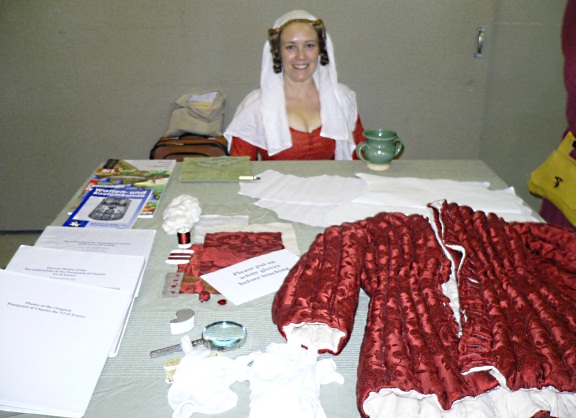
At last, I was done (more or less). It turned out remarkably close to the original and I’m proud of the project. I finally understand how makers coaxed such sleek, structured silhouettes from puffy, quilted panels of fabric. With densely packed cotton built to varying and curving heights and widths with the help of a quilting frame, the body can be transformed into a new shape.


The inner and outer assemblies are only attached in a few places: the center back seam (the rough overcast stitching mentioned above), the armholes, and all the edges (front opening, neckline, and skirt hem). The original had a line of light stitching that ran horizontally around the waist on the lining side, but does not show through, obviously, to the outer fabric. This could have been an anchoring stitch at the time it was added, but felt as though it were disconnected by the time I examined it. I omitted it from my reproduction, unsure of its necessity or purpose.
I estimate that the time it took to create this garment once I had the materials in place was approximately 200 hours. Surely a more experienced maker could move considerably faster through the quilting and sewing. Even so, if the time were cut in half, that is still a significant resource sink. It’s clearer than ever that such garments could not have been cheap to purchase. In fact, they likely existed solely at the pleasure of the most monied classes. These were not cheaper substitutes for other forms of armour, but armour in their own right. Men-at-arms wore them in a complementary manner with other armour pieces, such as mail and possibly plate.
I hope you enjoyed this series and learned a few new things. I certainly learned a lot from the process, and as always, my mistakes taught me the most.
4 thoughts on “Charles VI Coat Armour Repro, Part 4: Sewing It All Together”
Marvelous work! Congratulations and thank you for sharing it.
You are very welcome, and thank you.
Fantastic work and really a well written account. thank you so much for sharing.
You are most welcome. Thank you for your positive feedback.